DIY Wine Bottle Lamp: Easy Step-by-Step Guide
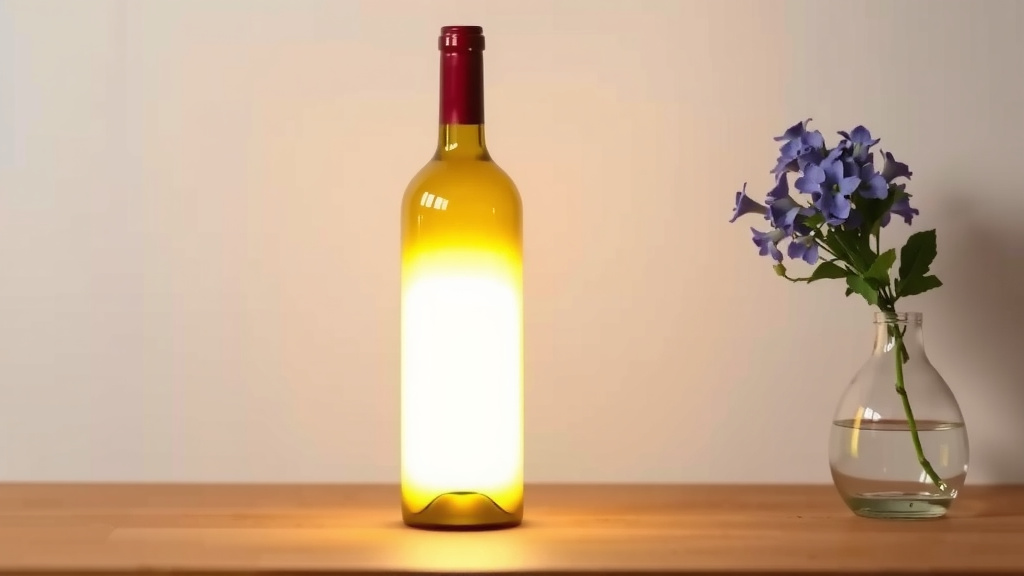
Yes, you can absolutely turn an empty wine bottle into a stylish and unique lamp! It’s a fun DIY project that lets you recycle old bottles and add a personal touch to your home decor. With a few basic supplies, you can create a beautiful wine bottle lamp.
Making your own wine bottle lamp is a fantastic way to upcycle and get creative. Many people enjoy this craft for its affordability and the chance to craft something truly one-of-a-kind. You’ll discover it’s easier than you might think to transform a simple bottle into a glowing centerpiece.
- Gather your supplies like a wine bottle, lamp kit, and shade.
- Clean the bottle thoroughly and remove any labels.
- Assemble the lamp kit according to its instructions.
- Secure the lamp kit to the bottle.
- Add a light bulb and your chosen lampshade.
Ready to give it a try? Let’s walk through exactly how to make your very own wine bottle lamp, step by step!
Crafting Your Own Wine Bottle Lamp
So, you’re ready to turn that empty wine bottle into a unique, glowing art piece? That’s fantastic! We’ve gathered the essential steps to guide you through this fun DIY project. It’s simpler than you might imagine. You’ll be amazed at how quickly you can transform a bottle into a beautiful lamp for your home.
Gathering Your Wine Bottle Lamp Supplies
Before you get your hands dirty, let’s make sure you have everything you need. Having all your materials ready makes the process smooth. It’s like prepping for a recipe; you don’t want to stop midway.
The Essential Components
Here’s a rundown of what you’ll want to collect. Think of this as your project shopping list.
- A clean wine bottle: Any color or shape works!
- A lamp kit: These typically include a threaded nipple, a socket, a harp holder, and sometimes a cord with a plug. You can find these at hardware stores or online craft suppliers.
- A drill with a diamond-tipped bit: For making a hole for the cord. We’ll talk more about this in a bit.
- A lampshade: Choose one that fits your bottle’s style and size.
- A light bulb: Make sure it’s the correct wattage for your socket.
- Optional decorative items: Like paint, twine, or craft gems if you want to add some flair.
Choosing the Right Bottle and Kit
Not all bottles are created equal for lamp projects. Some have thicker glass, making drilling easier. For the lamp kit, ensure it’s designed for bottle lamps. These kits are specifically made to fit securely into the bottle’s opening. We found that kits with adjustable bases work best for various bottle neck sizes.
Preparing Your Wine Bottle for Transformation
This is where the magic starts to happen. A clean canvas is key for a beautiful finish.
Cleaning and De-labeling
First, give your wine bottle a thorough washing inside and out. Remove any dried wine residue. For the labels, you have a few options. Soaking the bottle in warm, soapy water is often effective. You can also use a hairdryer to warm the adhesive, then gently peel the label off. Sometimes, a bit of Goo Gone or rubbing alcohol can help with stubborn sticky spots.
We found that a good scrub with a bottle brush ensures no lingering debris. A sparkling clean bottle makes for a much nicer final product. It’s the foundation of your lamp.
Drilling the Hole for the Cord
This is perhaps the most nerve-wracking part, but it’s totally doable with care. You’ll need to drill a small hole near the bottom of the bottle for the lamp cord to pass through. Safety first! Always wear safety glasses and gloves. It’s also wise to have a piece of scrap wood or a thick towel underneath the bottle to catch dust and provide a stable surface.
Here’s a breakdown of how to approach this:
Using a Diamond-Tipped Drill Bit
These bits are designed for drilling through glass and tile. Start by making a small mark where you want the hole. Apply gentle, consistent pressure. It’s crucial to keep the drill bit and the glass cool while drilling. A slow, steady stream of water or a specialized drilling lubricant can work wonders. This prevents the glass from cracking under the heat and stress.
Don’t rush this step. Let the drill do the work. We found that a speed of around 300-400 RPM is ideal. Once you’ve broken through the other side, gently enlarge the hole if necessary, but be cautious. A smooth hole is what you’re aiming for.
Alternative: Using a Lamp Kit with a Side Entry
Some lamp kits are designed to have the cord enter through the side of the bottle neck, eliminating the need for drilling. This is a great option if you’re not comfortable drilling glass. Always check the kit’s instructions carefully. These kits often have a rubber grommet to protect the cord.
Assembling Your Wine Bottle Lamp Kit
Once your bottle is prepped, it’s time to put the lamp kit together. These kits are designed to be user-friendly.
Attaching the Lamp Nipple
Most kits come with a threaded nipple. This piece will go through the bottle’s neck. Feed the electrical cord through the hole you drilled (or the designated entry point on the kit). Then, screw the threaded nipple onto the socket assembly. Some kits may require you to feed the cord through the nipple first. Always follow the specific instructions that came with your kit.
Securing the Lamp Kit to the Bottle
This is a vital step for safety and stability. The lamp kit usually has a base or a threaded rod that screws into the socket assembly. This part is designed to fit snugly into the wine bottle’s neck. You might use a rubber washer or a specialized stopper to create a tight seal. Ensure it’s firmly in place. A wobbly lamp is a safety hazard.
| Part | Function | Why It’s Important |
|---|---|---|
| Threaded Nipple | Connects the socket to the bottle and guides the cord. | Provides a secure connection and a path for electricity. |
| Socket | Holds the light bulb. | The heart of the lamp, where the bulb screws in. |
| Harp Holder | Attaches the lampshade support (harp). | Allows you to attach your chosen lampshade. |
| Cord and Plug | Carries electricity from the wall to the bulb. | The essential link to power your lamp. |
Adding the Finishing Touches
Your wine bottle lamp is almost ready to shine! It’s time for the final, creative steps.
Connecting the Harp and Lampshade
Most lamp kits include a harp, a U-shaped piece that attaches to the harp holder on the socket. The lampshade then rests on top of the harp. Simply slide the hole in your lampshade over the top of the harp and secure it with a finial (a decorative knob) if your shade comes with one. Make sure the lampshade is straight and centered over the bottle.
Installing the Light Bulb and Testing
Screw in your chosen light bulb. Ensure it’s the correct type and wattage for the socket. We recommend using LED bulbs as they tend to run cooler, which is safer for any decorative elements you might have added to the bottle. Plug in your lamp and flip the switch. Voila! You’ve created a beautiful, unique lamp.
Optional: Decorating Your Lamp
This is your chance to make it truly yours! You can paint the outside of the bottle, wrap it in twine or rope for a rustic look, or even fill the bottle (before assembly, of course!) with small decorative items like fairy lights or colored sand. Just be sure any decorations don’t interfere with the lamp kit’s components or create a fire hazard. Always prioritize safety.
Your Wine Bottle Lamp Checklist
Here’s a quick checklist to make sure you’ve covered all the bases for your project:
- Bottle cleaned and label removed.
- Bottle has a safely drilled hole for the cord.
- Lamp kit components are assembled correctly.
- Lamp kit is securely fastened to the bottle neck.
- Lampshade is attached and centered.
- Correct light bulb is installed.
You’ve done it! You’ve successfully crafted your very own wine bottle lamp. Isn’t it amazing what you can create from something you might have otherwise thrown away? Enjoy your new, personalized lighting!
Conclusion
You’ve successfully transformed an ordinary wine bottle into a personalized lamp! By following these steps, you’ve learned how to clean your bottle, safely drill a cord hole, and assemble a lamp kit. It’s incredibly rewarding to create unique decor that reflects your style and helps reduce waste. Take a moment to admire your handiwork.
Now that you know the process, why not try another bottle? Consider experimenting with different bottle shapes, colors, or even decorative finishes to build a collection of custom lamps for your home or to give as thoughtful gifts.
Frequently Asked Questions
Can I use any wine bottle for a lamp?
Generally, yes! Most standard wine bottles work well. Thicker glass bottles are often easier to drill safely, and ensuring the bottle opening is a common size will help with fitting standard lamp kits. Just make sure the bottle is clean and sturdy.
Is it safe to drill a hole in a wine bottle?
Yes, it can be safe if you take the proper precautions. Always wear safety glasses and gloves, keep the drill bit cool with water, and use a diamond-tipped bit designed for glass. Drilling slowly and steadily is key to preventing cracks and ensuring your safety.
What if I’m not comfortable drilling glass?
Don’t worry! Many lamp kits are designed with an alternative entry point for the cord, often near the bottle neck, which bypasses the need for drilling. You can also find kits that use a decorative stopper to hold the lamp assembly in place, eliminating the need for a drilled hole altogether.
How do I secure the lamp kit to the bottle?
Most lamp kits come with a threaded nipple or a base that fits snugly into the bottle’s neck. You’ll often use a rubber washer or a specialized fitting to create a tight seal and prevent wobbling. Ensuring it’s firmly attached is vital for stability and safety.
What kind of light bulb should I use in a wine bottle lamp?
We recommend using LED bulbs. They generate less heat, which is safer for the bottle and any decorative elements you might add. Plus, LED bulbs are energy-efficient and long-lasting, making them a practical choice for your DIY lamp.
![10 Best Cheap Table Lamps [2026]](https://bestdesklamp.com/wp-content/uploads/2026/08/10-best-cheap-table-lamps-2026-featured-768x432.jpg)