Chicks Need Heat Lamp: How Long in Winter
Chicks usually need a heat lamp for about 4 to 6 weeks, depending on the breed and the ambient temperature. During this period, their own fluffy down isn’t enough to keep them warm. You’ll know they’re ready to go without one when they can comfortably regulate their own body temperature and don’t huddle excessively under the heat source. It’s all about watching their behavior and adjusting the heat as needed.
Winter chicks present a unique challenge, as they’re starting life when the weather is already cold. This means you’ll need to pay extra attention to their environment. Providing consistent, safe warmth is absolutely essential for their survival and healthy development. Many backyard chicken keepers find that extending the brooding period slightly can be beneficial, especially if your chicks are young when winter truly hits.
- Chicks need heat for 4-6 weeks typically.
- Watch their behavior to tell if they’re warm enough.
- Winter chicks may need a bit longer with heat.
- Safety with heat lamps is a top priority.
- Don’t let them get too cold or too hot!
We’ve gathered the key information to help you ensure your little ones stay toasty and thrive. Let’s look at exactly how long your baby chicks will need that cozy heat lamp.
How Long Do Baby Chicks Really Need a Heat Lamp?
Your tiny fluffballs need a little extra help staying warm. Chicks are born with an instinct to seek heat, but they can’t generate much of their own body heat for the first few weeks. That’s where your trusty heat lamp comes in! We’ll guide you through understanding your chicks’ needs so you can provide the perfect temperature.
Understanding Chick Development and Temperature Needs
Chicks are born with downy feathers, not the insulating adult feathers they’ll grow into. This means they’re highly dependent on external heat sources. Their internal thermostat isn’t fully developed yet. Think of them like tiny, adorable thermostats that haven’t quite calibrated yet!
As they grow, their ability to regulate their body temperature improves. This development happens gradually over several weeks. You’ll see them start to feather out, and their activity levels will increase. These are all signs they’re becoming more self-sufficient.
The First Few Weeks: Maximum Warmth Required
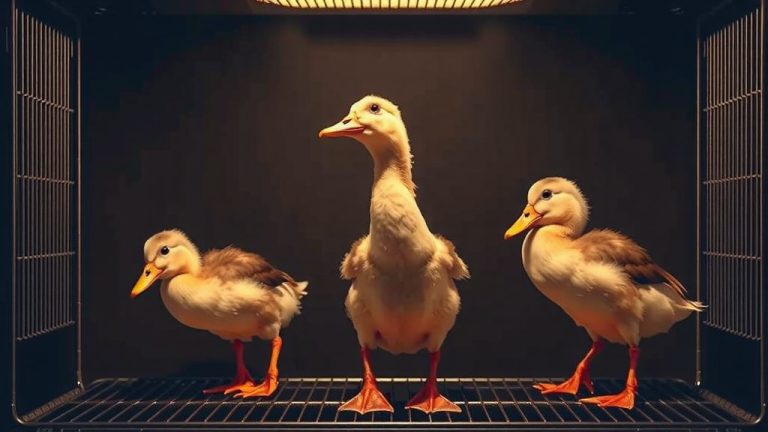
During their first week of life, chicks need the warmest temperatures. They will rely almost entirely on the heat lamp. They’ll be spending a lot of time snuggled up right under the lamp. This is a good sign they are getting the warmth they need.
Research indicates that for the first week, a temperature of around 95°F (35°C) is ideal. This is like a cozy, constant summer day for them. Maintaining this precise temperature is vital for their early survival and development. Too cold, and they can get sick quickly. Too hot, and they can overheat and become dehydrated.
Week 1: The Toasty Beginning
Your chicks should be in a brooder with a reliable heat source. The heat lamp is usually positioned so it creates a warm zone. The chicks can then move away from the heat if they feel too warm. This self-regulation is key. Your goal is to create a gradient of warmth.
We found that using a thermometer placed at chick level is the best way to monitor temperature. Don’t just guess! A simple thermometer placed in the brooder will tell you exactly what your chicks are experiencing. This is non-negotiable for healthy chicks.
Week 2: A Slight Decrease in Heat
As your chicks enter their second week, they can tolerate slightly cooler temperatures. We recommend reducing the temperature by about 5°F (3°C) each week. So, for week two, aim for around 90°F (32°C). They’re starting to grow a bit more down and their bodies are getting stronger.
You’ll notice they might not all be huddled directly under the heat lamp anymore. They’ll spread out a bit more in the brooder. If you see them all grouped tightly, it’s a sign they might still need more heat. This behavioral cue is very important to observe.
The Gradual Transition Away from the Heat Lamp
The process of weaning chicks off the heat lamp should be gradual. This slow transition allows their bodies to adjust naturally. It’s all about observing their behavior and making small temperature adjustments. This approach helps prevent shock or illness.
Many chicken keepers find that by the time chicks are about 4 to 6 weeks old, they can often be without supplemental heat. This timeline can vary, especially with winter chicks. They might need that cozy warmth a little longer.
Weeks 3 and 4: Getting More Independent
Continue to decrease the temperature by about 5°F (3°C) each week. By week three, aim for roughly 85°F (29°C). By week four, you’re looking at around 80°F (27°C). They should be looking much more like little chickens and less like fuzzy yellow balls. Their adult feathers will start to appear.
At this stage, you should be able to see them moving around the brooder more freely. They’ll be pecking at their food and water with more confidence. If they are consistently spreading out and not crowding under the heat source, they are likely comfortable. Always have a thermometer handy to check. This ensures you’re not misinterpreting their behavior.
Weeks 5 and 6: Testing the Waters
By week five or six, the temperature in the brooder can be around 70-75°F (21-24°C). This is closer to room temperature. At this point, you can try turning off the heat lamp for short periods. Observe your chicks closely during these times.
If they start to look droopy, cheep loudly, or huddle together, it means they are too cold. Turn the heat lamp back on immediately. The goal is to ensure they don’t get chilled. Many sources suggest that if the ambient room temperature is consistently above 70°F (21°C), they may be ready to go off heat around this time.
Special Considerations for Winter Chicks
Raising chicks during the colder months requires a bit more vigilance. Since the ambient temperature is already low, you need to be extra careful. They don’t have the benefit of warm outdoor air to help them regulate.
You might find that your winter chicks need to stay under the heat lamp for the full six weeks, or even a little longer. This is perfectly normal. Their environment outside the brooder will be much cooler than what summer chicks experience. You need to compensate for this.
Brooder Placement is Key in Winter
Where you place the brooder matters a lot in winter. Avoid drafty areas like garages or unheated porches. A spot in your house where the room temperature is stable and warm is best. Keep it away from windows that can get cold at night.
We found that placing the brooder in a frequently used room can be beneficial. This helps maintain a more consistent temperature. However, ensure the heat lamp isn’t pointing directly at anything flammable. Safety first, always!
Monitoring and Adjusting Heat for Winter Fluffballs
For winter chicks, you might need to keep the temperature at the higher end of the recommended range for longer. If your house is kept cooler, you may need to provide a bit more warmth. A gradual reduction is still the best approach, but the pace might be slower.
Consider using a thermostat-controlled heat lamp for winter brooding. This helps maintain a steady temperature without constant manual adjustments. It offers a higher level of safety and consistency. This can be a real lifesaver when you can’t always be right there.
Signs Your Chicks Are Ready to Ditch the Lamp
Observing your chicks is your best tool. Their behavior tells you everything you need to know about their comfort level. Here are some key indicators that they are ready to transition away from needing constant heat.
- They are fully feathered out, with only small stubs of adult feathers remaining.
- They are actively playing, running, and not just sleeping or panting.
- They are not huddling tightly together under the heat source, even at night.
- They are able to move comfortably between warmer and cooler areas of the brooder.
- They are eating and drinking well and appear alert and active.
If you see these signs consistently, it’s a good indication that their internal temperature regulation is working well. You can then feel confident about gradually reducing or removing the heat lamp. Remember, when in doubt, it’s always safer to provide a little more warmth than not enough.
Safety First: Heat Lamp Best Practices
Heat lamps are essential, but they can also pose fire hazards if not used correctly. Always use a reputable brand and inspect your lamp regularly. Ensure the cord is in good condition and not frayed. Secure the lamp firmly so it cannot fall into the brooder. This is a critical safety step.
We recommend using a clamp lamp with a ceramic socket. Always position the heat lamp so it hangs over the brooder. Use a wire guard around the bulb. This adds an extra layer of protection against accidental contact. Never place a heat lamp directly on bedding or near flammable materials. Many poultry experts stress this point. Fire prevention is always the priority.
What to Do If the Power Goes Out
A power outage during cold weather can be a chick emergency. Have a backup plan! This could include insulated coolers, hot water bottles (wrapped in towels), or hand warmers. You need a way to provide temporary heat.
For young chicks, you might need to do this within minutes of an outage. For older chicks, you may have a bit more time. Monitor them closely and keep them as warm as possible until the power is restored. This preparedness can make a huge difference in their survival.
Your Chick Brooding Checklist
Here’s a quick checklist to keep you on track with your chick’s heating needs:
- Check chick behavior: Are they spread out or huddled?
- Use a thermometer: Aim for 95°F (35°C) in week 1.
- Reduce heat weekly: Drop by 5°F (3°C) each week.
- Observe feather growth: More feathers mean less need for heat.
- Consider ambient temp: Winter chicks may need heat longer.
- Prioritize safety: Secure lamp, avoid flammables.
Conclusion
You’ve learned that providing the right heat for your chicks is vital, especially during winter. Remember to start warm and gradually decrease the temperature, aiming for about 4 to 6 weeks of supplemental heat. Always watch your chicks’ behavior—huddling means they’re cold, while scattering means they’re comfortable. For winter chicks, extend the brooding period if needed, and always prioritize safety with your heat lamp setup. Your attentive care will ensure your young flock grows up healthy and strong.
Frequently Asked Questions
Can I turn off the heat lamp all at once if it’s warm inside my house?
No, it’s best to avoid turning the heat lamp off all at once. Even if your house feels warm to you, your chicks might still need supplemental heat. A gradual reduction allows their bodies to adjust slowly and prevents them from getting chilled.
My chicks are 3 weeks old, but they still huddle together. What does this mean?
If your 3-week-old chicks are consistently huddling together under the heat lamp, it’s a clear sign they are too cold. You should continue providing a warmer temperature or check if the heat lamp is positioned correctly. They are not ready to have the heat reduced further.
How can I tell if my heat lamp is too hot for the chicks?
Signs of overheating include chicks panting, spreading their wings out, and trying to get as far away from the heat source as possible. They might also appear listless or weak. If you see these signs, immediately reduce the heat or raise the lamp higher.
Is it okay for winter chicks to stay under the heat lamp for longer than 6 weeks?
Yes, it is perfectly fine and often necessary for winter chicks to stay under the heat lamp for longer than 6 weeks. They are more susceptible to cold due to the lower ambient temperatures outside the brooder. Extend the brooding period as needed based on their behavior and feather development.
What’s the safest way to secure a heat lamp over a chick brooder?
The safest method is to use a clamp lamp with a strong clamp that can attach to the side of the brooder or a secure stand. Ensure the lamp is hung so it cannot fall into the bedding, and consider using a wire guard around the bulb for extra protection. Always double-check that it’s firmly attached.