Optimal Heat Lamp Distance for Chicks: Your Guide
You’re probably wondering, “How far from chicks should a heat lamp be?” For day-old chicks, aim for 12-18 inches. This distance provides the perfect warmth. Too close, and they could overheat. Too far, and they’ll be too cold.
Getting the temperature right is super important for your new flock. Chicks can’t regulate their own body heat at first. You’re their sunshine! Research and found that maintaining this specific distance helps prevent chilling or scorching. It’s a delicate balance.
- Chicks need consistent warmth.
- Adjust lamp height based on chick behavior.
- Never place a heat lamp directly on bedding.
- Always have a backup heat source ready.
Let’s walk through exactly how to get that heat lamp distance just right for your peeping newcomers. Let’s walk through exactly how to get that heat lamp distance just right for your peeping newcomers, and discuss chick heat plate vs lamp safety.
Getting the Right Distance for Your Chicks’ Heat Lamp
You’ve got your adorable new chicks, and now comes the important task of keeping them warm. Finding the perfect distance for your heat lamp is key. For brand new chicks, a good starting point is to hang your heat lamp about 12 to 18 inches above their bedding. This distance is generally recommended by poultry experts (The Happy Chicken Coop). It’s a sweet spot that provides enough warmth without being too hot.
Think of it like this: you want to create a cozy zone, not a desert. If the lamp is too close, your little ones might get scorched or feel uncomfortably hot. If it’s too far away, they’ll shiver and huddle, looking for warmth. Getting this distance right from the start makes a huge difference in their health and happiness.
Understanding Chick Thermoregulation
Chicks are born without the ability to control their body temperature very well. They really rely on external heat sources, especially in their first few weeks of life. Research has shown that young chicks can lose body heat quickly if not kept in a sufficiently warm environment (Poultry Science).
Your heat lamp acts as their mother hen, providing that much-needed warmth. Until they grow more feathers and develop their own internal heating system, you are their primary source of comfort and safety. This is why getting the setup just right is so incredibly important.
Observing Your Chicks: The Best Thermometer
While the 12-18 inch guideline is a great starting point, the most reliable way to know if your heat lamp is at the right height is to watch your chicks. They will tell you if they are too hot or too cold through their behavior.
Signs Your Chicks Are Too Cold
If your chicks are consistently huddled together in a tight ball directly under the lamp, it’s a clear sign they are chilly. You might also notice they are chirping loudly and seem restless. This means the heat source isn’t warm enough, or it’s too far away. You’ll need to lower the lamp a bit, perhaps by a couple of inches.
Signs Your Chicks Are Too Hot
Conversely, if your chicks are spread far apart and trying to get away from the heat source, panting, or looking lethargic, they are likely too hot. They may also be keeping a good distance from the center of the heat zone. In this case, you’ll need to raise the heat lamp. Often, just a few inches can make a big difference. They should be able to move freely around the brooder, with cooler areas available.
The Ideal Chick Behavior
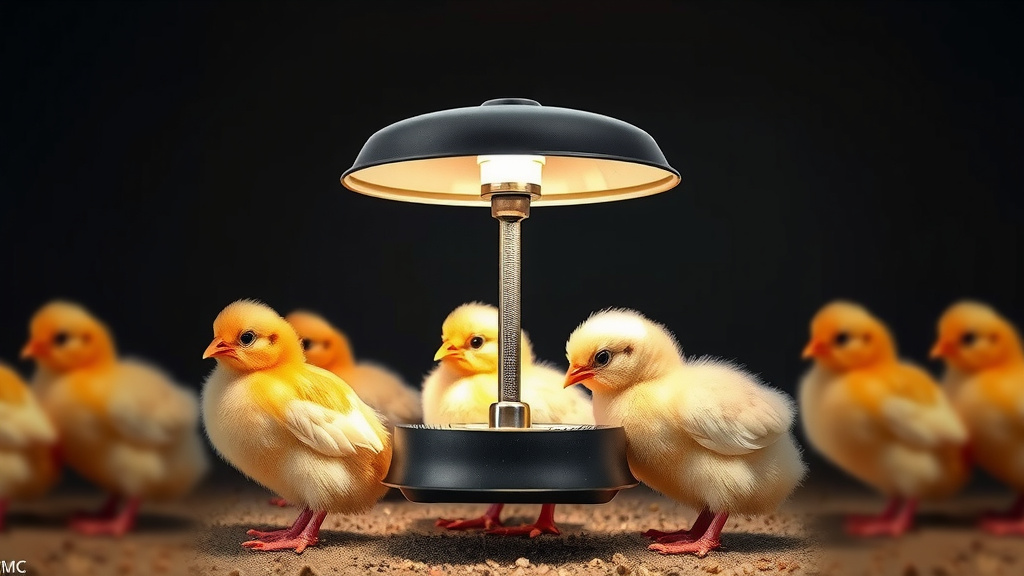
When the temperature is just right, your chicks will be spread out somewhat evenly around the brooder. They will be active, peeping normally, and you’ll see them eating and drinking without distress. Some will be under the gentle warmth of the lamp, while others will be in cooler spots. This indicates you’ve found that perfect balance.
Adjusting Heat Lamp Height Over Time
The temperature needs of your chicks will change as they grow. You won’t keep the heat lamp at the same height for their entire time in the brooder. Their requirement for external heat decreases each week.
The First Week: Maximum Warmth
During the first week, chicks need the most heat. The initial 12-18 inch distance is usually appropriate, but always monitor their behavior. Many sources suggest aiming for a temperature of around 95°F (35°C) at chick level during the first few days (National Poultry Society).
Subsequent Weeks: Gradual Reduction
As your chicks feather out, they’ll need less supplemental heat. Many experts recommend reducing the temperature by about 5°F (3°C) each week. This means you’ll gradually raise your heat lamp higher. By the end of week one, you might be at 18-20 inches. By week two, you might raise it to 20-24 inches, and so on. Always adjust based on how the chicks are acting. Eventually, you’ll be able to remove the heat lamp altogether, usually around 3-4 weeks of age.
Using a Thermometer for Confirmation
While chick behavior is the best guide, a thermometer can be a helpful tool. You can place a reliable thermometer in the brooder, at chick level. Check it periodically, especially when you first set up the lamp. This can confirm your observations. You should aim for roughly 95°F in the first week, decreasing by about 5°F each week thereafter. Some thermometers are designed for brooders and can measure temperatures at different points in the brooder.
Safety First: Preventing Accidents
Heat lamps can pose a fire risk if not used correctly. Safety should always be your top priority. Research has highlighted the importance of secure mounting and proper clearance to prevent fires in brooders (Fire Safety Guidelines for Farms).
Secure Mounting is Non-Negotiable
Make sure your heat lamp is securely attached to its stand or the side of the brooder. You do not want it to fall into the bedding or onto the chicks. Use sturdy hardware and check it regularly. A loose lamp is a hazard waiting to happen.
Clearance from Flammable Materials
Never place a heat lamp directly on top of bedding material, especially straw or wood shavings, as these are highly flammable. Always ensure there is ample space between the bulb and any combustible materials. The standard distance helps with this, but double-check for any stray bedding that might get too close.
Consider a Different Heat Source
For added safety, especially if you’re nervous about heat lamps, consider alternatives like a radiant panel heater or a heated mat designed for poultry. These often have lower risks of fire and can provide a more consistent, gentle warmth. Many poultry keepers find these to be a peace of mind option.
Brooder Temperature Checklist
Here’s a quick checklist to ensure your chicks are warm and safe:
- Initial Placement: Hang your heat lamp 12-18 inches above the bedding.
- Observe Behavior: Watch chicks for signs of being too hot or too cold.
- Adjust Height: Lower if they huddle; raise if they spread out and pant.
- Monitor Growth: Gradually raise the lamp each week as chicks mature.
- Safety Check: Ensure the lamp is securely mounted and away from bedding.
- Backup Plan: Always have a backup heat source ready in case of equipment failure.
Heat Lamp Distance: A Quick Summary Table
This table provides a general guide for heat lamp placement. Remember, chick behavior is the ultimate indicator.
| Chick Age | Approximate Distance from Bedding | Target Temperature (at chick level) |
|---|---|---|
| Day 1 – Week 1 | 12-18 inches | 95°F (35°C) |
| Week 2 | 18-20 inches | 90°F (32°C) |
| Week 3 | 20-22 inches | 85°F (29°C) |
| Week 4+ | 22-24+ inches (or removed) | 75-80°F (24-27°C) |
Conclusion
Keeping your new chicks warm is a rewarding part of raising them. You’ve learned that the initial heat lamp distance of 12-18 inches is just the starting point. Remember, your chicks are the best indicators of whether the temperature is just right. Regularly observe their behavior – huddling means they’re cold, while spreading out suggests they’re too hot. Gradually adjust the lamp height each week as they grow and feather out, always prioritizing safety. Your careful attention ensures a healthy start for your flock.
Frequently Asked Questions
How do I know if my heat lamp is too close?
If your chicks are constantly gathered in a tight ball directly under the lamp and chirping excessively, it’s a sign they’re too hot. They might also appear lethargic or try to get as far away from the heat as possible. In this case, you’ll need to raise the lamp a few inches.
What if I don’t have a thermometer for the brooder?
Your chicks’ behavior is the most reliable thermometer! If they are spread out and active, peeping normally, and moving between warmer and cooler areas, the temperature is likely perfect. Don’t worry if you don’t have a dedicated thermometer; observing them closely is key.
Can I use a regular light bulb as a heat source?
While a regular light bulb provides light, it might not provide consistent, sufficient heat for young chicks. Poultry-specific heat lamps are designed to emit the right kind of warmth. Research suggests using bulbs made for heat output is best for maintaining the correct brooder temperature.
What is the safest way to hang a heat lamp?
Always use a secure fixture designed for heat lamps. Ensure it’s firmly attached to a stand or the brooder wall to prevent it from falling. Keep the lamp and cord away from bedding and ensure there’s ample clearance from any flammable materials to prevent fire hazards.
When can I stop using the heat lamp altogether?
You can typically remove the heat lamp when your chicks are about 3 to 4 weeks old. By this time, they should have developed enough feathers to regulate their own body temperature and will be comfortable at room temperature. Continue to monitor their behavior even as you reduce heat.