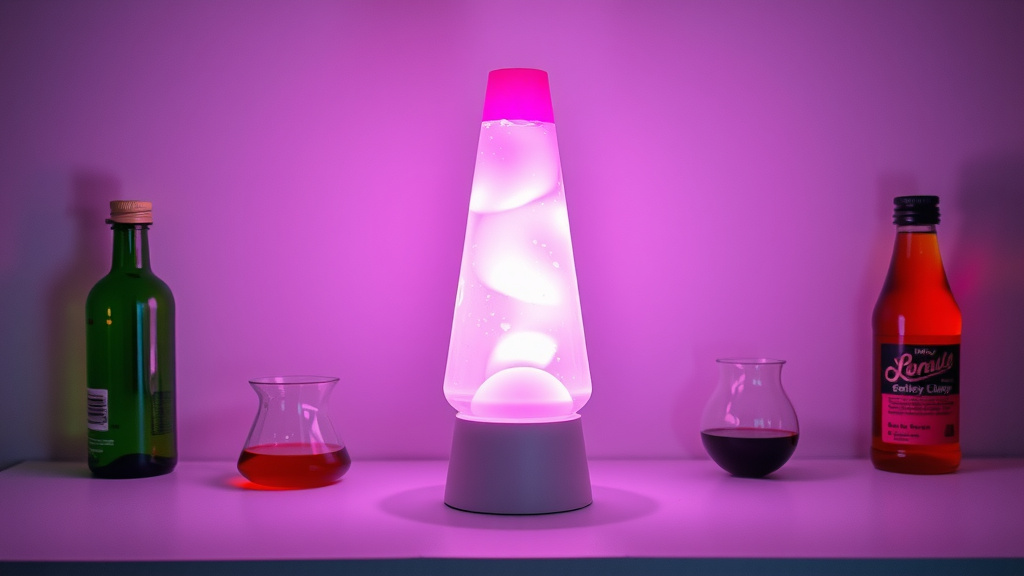
Easy Homemade Lava Lamp: A Fun Science Project
You absolutely can make your own homemade lava lamp! It’s a fun and easy science experiment that uses simple household items. You’ll need a clear bottle, water, oil, food coloring, and effervescent tablets for that classic bubbly effect. Get ready for some mesmerizing, groovy action right in your living room!
Creating a DIY lava lamp is a fantastic way to understand basic scientific principles like density and chemical reactions. It’s a project that’s both educational and visually captivating for all ages. Plus, you get to control the colors for a truly personalized touch!
- Gather your materials: bottle, water, oil, food coloring, Alka-Seltzer.
- Fill the bottle mostly with oil.
- Add water and food coloring.
- Drop in pieces of effervescent tablet.
- Watch the bubbly show!
Ready to get your hands a little messy and create some bubbly magic? Let’s walk through exactly how this works step by step, and you’ll have your own cool lava lamp in no time.
Creating Your Own Groovy Lava Lamp at Home
You’re looking to make a homemade lava lamp, and you’ve come to the right place! It’s a super fun project that combines science with a bit of visual magic. Imagine watching colorful blobs gently rise and fall, just like the classic lamps. This DIY version is easier than you think and uses everyday items you probably already have in your kitchen or bathroom.
What You’ll Need for Your DIY Lava Lamp
Gathering your supplies is the first step to some bubbly fun. You don’t need anything fancy or hard to find. Think of it like preparing for a simple science class experiment, but with much cooler results!
The Essential Ingredients and Tools
Here’s a rundown of what you’ll want to have on hand:
- A clean, clear plastic bottle or glass jar. A 16-20 ounce size works well. Make sure it has a secure lid.
- Vegetable oil or baby oil. About 3/4 of the bottle’s volume.
- Water. This will fill the rest of the bottle.
- Food coloring. Pick your favorite colors for the bubbly effect!
- Effervescent tablets. These are the magic makers! Alka-Seltzer tablets are perfect.
Why These Items Work Together
Each item plays a specific role in creating the lava lamp effect. The oil and water don’t mix, which is key. The food coloring only mixes with the water. The effervescent tablets create a gas that makes the colored water bubbles move. We’ll get into the science behind it soon!
Step-by-Step Guide to Making Your Lava Lamp
Let’s get started! This process is straightforward and should only take a few minutes to assemble. The real fun comes after when you activate it.
Step 1: Prepare Your Container
Make sure your bottle or jar is clean and completely dry. Any residue could affect how the liquids interact. Remove any labels if you want a clearer view of the bubbling action. A plain bottle looks pretty neat!
Step 2: Add the Oil
This might seem backward, but you’ll fill your container mostly with oil first. Pour your vegetable or baby oil into the bottle until it’s about three-quarters full. The oil creates the main body of your lamp.
Step 3: Introduce the Water and Color
Now, gently pour water into the bottle. Fill it up, leaving a little bit of space at the very top. You’ll notice the water sinks below the oil. This is because water is denser than oil. Next, add a few drops of your chosen food coloring. Don’t stir! The food coloring will pass through the oil and color the water at the bottom. You can add multiple colors if you like!
Step 4: Activate the Bubbles!
This is where the excitement happens. Break an effervescent tablet into a few smaller pieces. Drop one piece into the bottle. Watch what happens! You’ll see a reaction start almost immediately. The tablet will fizz and release bubbles.
Step 5: Observe the Lava Effect
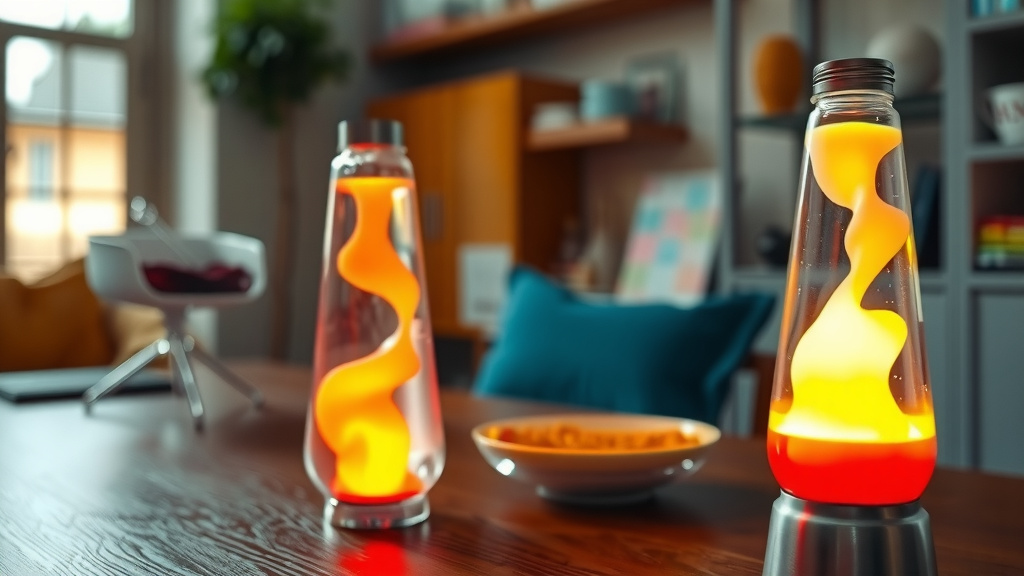
As the tablet fizzes, it creates carbon dioxide gas. These gas bubbles attach to the colored water. They rise through the oil because the gas makes them less dense. When the bubbles reach the top, the gas escapes, and the colored water becomes dense again. It then sinks back down. This cycle creates the mesmerizing lava lamp effect you’re looking for!
Step 6: Keep the Show Going
Once the fizzing from the first tablet piece stops, simply add another piece. You can keep adding pieces to reactivate your lava lamp. It’s a great way to entertain yourself or others for a while. Just remember to put the lid on tightly when you’re done to store it.
Understanding the Science Behind Your Lava Lamp
Ever wonder why oil and water don’t mix? It all comes down to something called polarity. Water molecules are polar, meaning they have a slight positive charge on one end and a slight negative charge on the other. Oil molecules, on the other hand, are nonpolar. Polar molecules like to stick together, and nonpolar molecules like to stick together. This is why they separate into distinct layers.
Density is Key
We mentioned density earlier, and it’s a crucial concept here. Density is basically how much “stuff” is packed into a certain amount of space. Water is denser than oil. That’s why the water sinks to the bottom. When the effervescent tablet reacts, it produces carbon dioxide gas. Gas is much less dense than both water and oil. The gas bubbles carry the colored water up through the oil.
The Chemical Reaction Explained
Effervescent tablets contain an acid (like citric acid) and a base (like sodium bicarbonate, or baking soda). When these ingredients dissolve in water, they react. This reaction releases carbon dioxide gas. You see this same reaction in baking when you use baking soda and an acid. The fizzing is the gas escaping. Many science educators highlight this reaction as a simple way to demonstrate gas production (National Science Teaching Association).
Tips for the Best Homemade Lava Lamp Experience
Want to make your DIY lava lamp even better? Here are a few extra tips to enhance your creation.
Color Combinations and Effects
Don’t be afraid to experiment with different food coloring. You can try one vibrant color or even mix a couple for a unique hue at the bottom. What happens if you use glitter? Some people find adding a bit of glitter can add an extra sparkle to the rising blobs.
Lighting Up Your Lamp
For an extra groovy effect, try shining a light through your lava lamp. A small flashlight or a phone’s flashlight can be placed behind or under the bottle. This will illuminate the bubbles as they move, making it look even more like a traditional lava lamp.
Safety First!
Always supervise children when they are making or playing with their lava lamps. While the ingredients are generally safe and found in many homes, they are not meant for consumption. Ensure the lid is securely fastened when not in use to prevent spills. Also, the glass bottle might break if dropped, so handle with care!
Your Lava Lamp Checklist
Here’s a quick checklist to make sure you have everything ready:
- Clean, clear bottle or jar
- Vegetable or baby oil
- Water
- Food coloring
- Effervescent tablets (like Alka-Seltzer)
- A flat surface to work on
Conclusion
You’ve now learned how to create your very own mesmerizing lava lamp using simple household items! It’s a fun and educational project that beautifully demonstrates scientific principles like density and chemical reactions. You can easily whip this up for a quick science experiment or a fun activity for guests. Remember, the magic happens with the oil, water, and fizzing tablets working together. Now, go ahead and start building your groovy lamp – enjoy the bubbly show you’ve created!
Frequently Asked Questions
How long does the homemade lava lamp last?
Your homemade lava lamp will continue to bubble as long as you add pieces of the effervescent tablet. Once the tablet is gone, the effect stops, but you can easily restart it by adding more. Store it with the lid on tightly when not in use.
Can I use a different type of oil?
Yes, other oils like mineral oil can also work. The key is that the oil should be less dense than water and should not mix with it. Vegetable oil or baby oil are readily available and commonly used for this project.
Why won’t my food coloring mix with the oil?
Food coloring is water-based, and oil and water don’t mix. The food coloring will pass through the oil layer because it’s attracted to the water molecules. This separation is what allows the colored water blobs to form and move.
What happens if I shake the bottle?
Shaking the bottle will temporarily mix the oil and water. However, they will naturally separate again over time due to their different densities and polarities. It’s best to avoid shaking and let the natural science process create the lava lamp effect.
Can I make a homemade lava lamp without effervescent tablets?
While effervescent tablets provide the classic bubbly effect, you can create a similar visual without them. Instead of tablets, you could try adding a small amount of salt, which will sink and then release pockets of colored water as it dissolves. However, the fizzing action from tablets is the most effective.
![10 Best Cheap Nail Lamp [2026]](https://bestdesklamp.com/wp-content/uploads/2026/08/10-best-cheap-nail-lamp-2026-featured-768x432.jpg)
![10 Best At Home Uv Gel Lamp [2026]](https://bestdesklamp.com/wp-content/uploads/2026/08/10-best-at-home-uv-gel-lamp-2026-featured-768x432.jpg)