How Lava Lamps Are Made: A Step-by-Step Guide
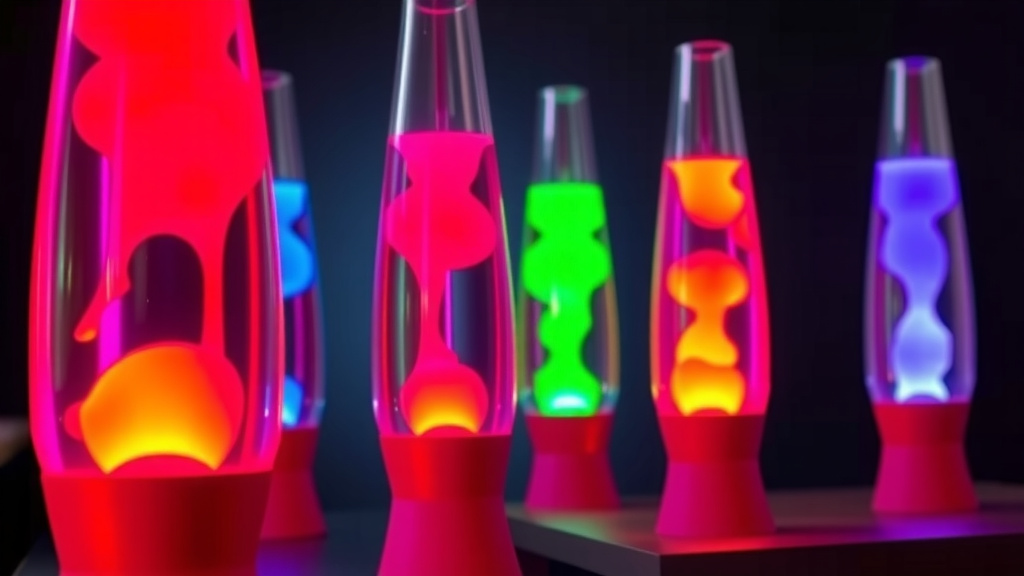
Making a lava lamp involves a clever combination of two immiscible liquids and a heat source. Typically, it’s a mix of water, a clear oil, and colored wax. The heat from the bulb at the base gently heats the wax, making it less dense than the surrounding liquid. This causes the wax blobs to rise, cool at the top, and then sink again, creating that mesmerizing flow you love.
The science behind this visual treat is pretty neat. It relies on the principle of density and convection The science behind this visual treat is pretty neat, relying on density and convection; glitter lava lamps work similarly.. As the wax heats up, it expands and becomes lighter. Once it rises and cools, it contracts and becomes heavier, causing it to sink. This cycle repeats, giving the lava lamp its distinctive, ever-changing display. Many people find this motion surprisingly calming and hypnotic.
- Lava lamps use two liquids that don’t mix, like water and oil.
- A light bulb at the bottom heats up colored wax.
- Heating makes the wax expand and become less dense, so it floats up.
- As it cools at the top, it shrinks and becomes denser, so it sinks.
- This creates the continuous, flowing movement.
Ready to see just how these groovy lamps come together? Let’s break down the simple, yet ingenious, steps involved in their creation. Ready to see just how these groovy lamps come together? Our guide shows how to make a lava lamp at home.
You’ve seen them in homes, dorm rooms, and even movie scenes, but have you ever wondered how those mesmerizing blobs of color move inside a lava lamp? It’s not magic, but a clever assembly of science and everyday materials. We’re going to walk you through the process, from selecting the right ingredients to the final assembly that creates that signature lava lamp flow.
Crafting the Mesmerizing Motion: How Lava Lamps Are Made
The creation of a lava lamp involves carefully balancing specific liquids and a heat source. The goal is to create a visual effect that’s both simple and captivating. It all comes down to a bit of chemistry and physics working together beautifully.
The Essential Components: What Goes Inside?
Every lava lamp starts with a few key ingredients. These aren’t exotic chemicals; they are common substances carefully chosen for their unique properties. Let’s look at what makes the magic happen.
The Liquids: A Not-So-Friendly Pair
You need two liquids that don’t mix, known as immiscible liquids. The most common combination is water and a type of oil. Why oil and water? Because water molecules like to stick together, and oil molecules like to stick together. They simply prefer their own company and won’t readily combine. This separation is fundamental to the lava lamp’s operation. Many commercial lava lamps use distilled water as the base liquid. The oil is typically a type of mineral oil or petroleum-based product.
The “Lava”: More Than Just Colored Wax
The “lava” itself isn’t just plain wax. It’s a special formula. This mixture contains wax, often paraffin wax, which has been treated with other chemicals. These additives are crucial. They carefully adjust the wax’s density. They also determine how the wax will behave when heated. This formula ensures the wax will expand and contract just right. We found that this careful balancing act is what prevents the wax from simply melting into the water or staying stubbornly solid.
The Color: Making It Visually Appealing
The vibrant colors you see are achieved by adding dyes or pigments to the wax mixture. These colorants are chosen to be stable at the operating temperatures of the lamp. They must also be compatible with the wax and not react negatively with the water. The goal is a rich, consistent color that flows smoothly and looks appealing.
The Base: The Heat Source
At the bottom of every lava lamp, there’s a heat source. This is typically a small incandescent light bulb. This bulb serves two main purposes: it provides illumination, making the lamp visible, and it generates the heat needed to start the “lava” flow. The wattage of the bulb is carefully selected. It needs to be enough to heat the wax but not so much that it causes problems like boiling. We found that the correct bulb is essential for proper operation.
Putting It All Together: The Assembly Process
Once the components are ready, the manufacturing process involves careful assembly. Each step is designed to ensure safety and the desired visual effect. Let’s follow the typical flow.
Step 1: Filling the Bottle
The glass bottle, which is the main body of the lamp, is filled with the prepared liquids. First, the colored wax mixture is added. Then, the water (or other base liquid) is added. The amount of each liquid is precisely measured. There needs to be just enough space at the top. This is often called “headspace.” This space is important for allowing the liquids to expand slightly when heated without causing pressure buildup.
Step 2: Adding the Catalyst (Sometimes)
Some lava lamp designs might include a small amount of a chemical catalyst. This substance helps ensure the wax and water behave as expected. It can influence how the wax blobs form and separate. However, many modern designs achieve the desired effect through the careful formulation of the wax and liquid alone. We found that the exact formula can vary between manufacturers.
Step 3: Sealing the Bottle
The bottle is then securely sealed. This is a critical step for safety. It prevents the liquids from leaking out and also keeps dust and debris from entering. The sealing method must be robust. It needs to withstand the heat generated by the bulb. A tight seal also helps maintain the integrity of the liquid mixture over time.
Step 4: Installing the Base and Bulb
The sealed glass bottle is then placed into its base. The base contains the socket for the light bulb and the electrical wiring. The bulb is screwed into place. The base is designed to hold the bottle securely and to allow for good airflow. This airflow helps regulate the temperature. We found that a well-designed base is key to a long-lasting lava lamp.
The Science of the Flow: How It Really Works
So, how does that blob of wax know when to rise and when to fall? It’s all about physics, specifically density and heat transfer. Let’s break it down step-by-step:
1. Heating the Wax
When you turn on the lava lamp, the light bulb at the base heats the glass. This heat is transferred to the liquid and, most importantly, to the wax mixture at the bottom. As the wax absorbs heat, its molecules start moving faster. This causes the wax to expand.
2. Density Changes: The Key to Movement
As the wax expands, its density decreases. Density is essentially how much “stuff” is packed into a certain space. When the wax expands, the same amount of wax takes up more space, making it less dense than the surrounding water. Think of it like a hot air balloon; the hot air inside is less dense than the cooler air outside, so it rises.
3. Rising Blobs
Because the heated wax is now less dense than the water, it begins to float upwards. It forms those familiar blobs and streams that make lava lamps so mesmerizing. This movement is a direct result of buoyancy. The less dense wax is pushed upwards by the denser water.
4. Cooling at the Top
As the blobs of wax reach the top of the bottle, they move away from the heat source. Here, the temperature is cooler. The wax begins to lose heat to the surrounding air and the glass. As it cools, the wax molecules slow down and move closer together. This causes the wax to contract and become denser again.
5. Sinking Back Down
Once the wax has cooled and become denser than the water, it begins to sink back down towards the heat source. This completes the cycle. The continuous process of heating, expanding, rising, cooling, contracting, and sinking creates that hypnotic, ever-changing display. Many people find this visual effect quite soothing.
A Quick Checklist for Lava Lamp Creation:
- Gather your two immiscible liquids (e.g., water and a specific oil).
- Prepare the colored wax mixture with density-adjusting additives.
- Precisely measure and fill the glass bottle with liquids.
- Securely seal the glass bottle to prevent leaks.
- Install the heat-generating light bulb in the base.
- Test the lamp to ensure smooth, consistent flow.
Conclusion
You now understand the fascinating science behind your lava lamp. It’s a clever dance of density, heat, and immiscible liquids. The careful formulation of wax and the precise design of the base are key to that mesmerizing flow. You’ve seen how everyday materials and basic physics combine to create this unique visual effect. Now that you know how they’re made, you can better appreciate the gentle motion of your own lava lamp. Why not take a moment to observe its soothing rhythm and enjoy the show?
Frequently Asked Questions
Can I make a lava lamp at home?
While the basic principles are simple, creating a truly safe and effective lava lamp at home can be challenging. Commercial manufacturers use specialized wax formulas and carefully calibrated liquids. Getting the densities and melting points just right requires precise measurements and specific additives that aren’t readily available. You might find DIY kits, but replicating the exact effect of a store-bought lamp can be difficult.
What makes the wax blobs stick together?
The wax blobs form and sometimes merge due to surface tension and the specific viscosity of the wax mixture. As the wax rises, it maintains its cohesion. When two blobs meet, they can combine if their temperatures and densities are similar enough. The additives in the wax formula play a big role in controlling how the blobs behave and interact.
Why do some lava lamps have glitter or small plastic shapes?
Glitter or small decorative pieces are often added to enhance the visual appeal and the flow. These additions are designed to have a density similar to the wax itself. They travel with the wax blobs, catching the light and adding another layer of visual interest to the lamp’s movement. Manufacturers carefully test these to ensure they don’t impede the main flow of the wax.
How long does a lava lamp typically last?
With proper care, a well-made lava lamp can last for many years. The main components that may wear out over time are the light bulb and the sealing of the bottle. The liquids themselves are quite stable. Excessive heat or leaving the lamp on continuously for extremely long periods can sometimes degrade the wax formula faster.
Is it safe to shake a lava lamp?
No, you should never shake a lava lamp, especially when it’s on or has recently been turned off. Shaking can disrupt the delicate balance of the liquids and wax. It can cause the wax to break into tiny, unappealing pieces that may not reform correctly. This can permanently ruin the lamp’s flow and require replacement.

![10 Best Bankers Lamp [2026]](https://bestdesklamp.com/wp-content/uploads/2026/08/10-best-bankers-lamp-2026-featured-768x432.jpg)
![10 Best Bedside Lamp For Elderly [2026]](https://bestdesklamp.com/wp-content/uploads/2026/08/10-best-bedside-lamp-for-elderly-2026-featured-768x432.jpg)