How to Replace a Lamp Socket: A Step-by-Step Guide
Yes, you can absolutely replace a lamp socket yourself with a few basic tools and some patience. It’s a common DIY repair that can save your favorite lamp from the discard pile. This process involves safely disconnecting power and then swapping out the old socket for a new one, often a task that takes less than an hour to complete for most do-it-yourselfers.
Many people find lamp repair less intimidating than they imagine. A broken socket can make your lamp useless, but replacing it is a straightforward way to restore functionality. We found that with careful attention to electrical safety, this fix is well within reach for most homeowners, breathing new life into lamps you thought were beyond repair.
- Always unplug your lamp first.
- Gather your new socket and basic tools.
- Carefully disassemble the lamp’s top.
- Connect the wires to the new socket.
- Reassemble and test your lamp.
Ready to give your lamp a new lease on life? Let’s walk through the simple steps to replace that socket.
Repairing Your Lamp’s Socket: A Step-by-Step Guide
You’ve noticed your lamp isn’t working, and upon closer inspection, you see the socket is damaged or just plain worn out. Don’t toss that lamp just yet! Replacing a lamp socket is a very achievable DIY project. You can often complete it in under an hour. It’s a fantastic way to bring a beloved lamp back to life.
What You’ll Need for the Job
Before you start, gather your supplies. Having everything ready makes the process smooth. You’ll need a few basic tools that most households already possess. Think of it like preparing ingredients before you cook.
Essential Tools and Materials
Here’s what you should have on hand:
- A new lamp socket (make sure it matches your old one in style and connection type)
- Wire strippers/cutters
- Screwdriver (usually a Phillips head)
- Needle-nose pliers
- An old towel or drop cloth (to protect your work surface)
- A small container for screws
Choosing the Right Replacement Socket
Finding the correct replacement socket is key. Lamp sockets come in various types. You’ll want one that fits your lamp’s existing setup. Look at your current socket for clues. Most common sockets are made of brass or plastic. Some have threaded necks, while others are designed to be crimped or screwed onto the lamp’s pipe. Many also have different types of switches, like turn knobs or pull chains. Taking a picture of your old socket can be helpful when shopping.
Safety First: Disconnecting Power
This is the most important step. Working with electricity, even low voltage from a lamp, requires caution. Always prioritize your safety. We learned from electrical safety guidelines that a simple mistake here can be serious (Electrical Safety Foundation International).
Unplugging Your Lamp
Make absolutely sure your lamp is unplugged. Don’t just turn it off at the switch. Pull the plug from the wall outlet. Double-check it. A lamp can look off but still be connected. It’s better to be overly cautious.
Testing for Power (Optional but Recommended)
For an extra layer of safety, you can test the wires to ensure no power is flowing. You would need a non-contact voltage tester. Touch it to the wires you’ll be working with. If it lights up or beeps, there’s still power. Keep the lamp unplugged until you’re sure. Many home safety resources recommend this step, especially if you’re unsure about your lamp’s wiring (Consumer Product Safety Commission).
Disassembling the Lamp Top
Now, let’s get to the part where we access the old socket. This usually involves carefully taking apart the top section of your lamp. Remember to keep screws and small parts organized. Losing them can make reassembly tricky.
Removing the Lamp Shade and Harp
Most lamps have a shade secured by a finial or a harp holder. Unscrew the finial at the top of the shade. If your lamp has a harp (the U-shaped metal piece that supports the shade), it often lifts out or is secured by small screws at its base. Gently set these aside. Your old towel can be useful here to prevent scratches.
Accessing the Socket Housing
The socket is usually held in place by a threaded cap or a retaining ring. This piece screws onto the base of the socket, securing it to the lamp’s body. You might need to gently twist this cap counter-clockwise to loosen it. Some sockets are held in place by screws. Look closely for any screws holding the socket or its housing. Once loosened, the socket assembly should become accessible.
Removing the Old Socket
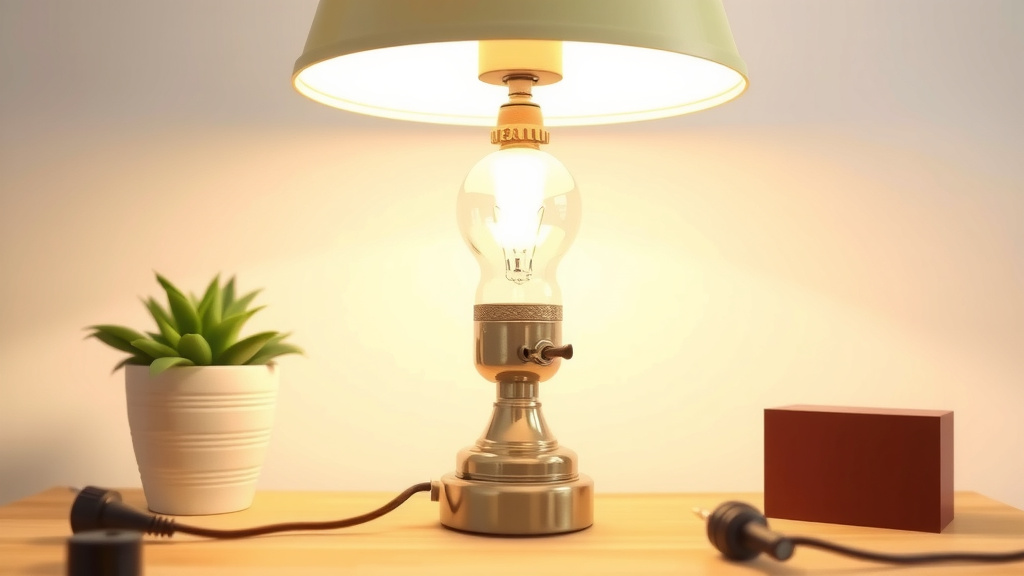
Once the housing is off, you’ll see the wires connected to the socket. They are typically attached with small screws on the sides of the socket. Before disconnecting anything, take a clear photo with your phone. This will serve as your reference for wiring the new socket. Note which wire goes to which terminal. Then, use your screwdriver to loosen these terminal screws and gently pull the wires free. If the wires are very old or brittle, be extra careful not to break them. Some older lamps might have wires that are pushed into small holes; you might need a small tool to release them. Most modern sockets use screw terminals.
Wiring the New Lamp Socket
This is where your photo and careful attention come in handy. Connecting the wires correctly ensures your lamp works safely.
Connecting the Wires
Your new socket will have similar terminal screws. Identify the two wires coming from your lamp’s cord: the hot wire (often smooth or has a stripe) and the neutral wire (often ribbed or plain). The new socket will have two terminals, usually marked “G” (ground, if applicable) or simply labeled with screw heads. You want to connect the wires to the appropriate terminals. Generally, the ribbed wire connects to the silver-colored screw, and the smooth wire connects to the brass-colored screw. If your socket has a ground wire (usually green), connect it to the green screw terminal if present.
Wrap the stripped end of each wire snugly around the corresponding terminal screw. Make sure there are no stray wire strands. Tighten the screws firmly. Ensure the wires are secure and won’t pull out. Research from electrical safety organizations consistently highlights the importance of secure connections to prevent overheating (Occupational Safety and Health Administration).
Securing the New Socket
Gently tuck the wires back into their housing. Now, screw the new socket into place. If it has a threaded neck, it should screw into the lamp’s pipe. If it uses a retaining ring, screw that ring on. Make sure the socket is straight and secure. Then, reattach the socket housing or cap you removed earlier. It should screw back on tightly to hold the socket in place.
Reassembly and Testing Your Lamp
You’re almost done! It’s time to put your lamp back together and see if your hard work paid off.
Putting It All Back Together
Reattach the lamp harp if you removed it. Place the lamp shade back on its support. Screw the finial back on to hold the shade securely. Make sure everything is snug but don’t overtighten. You don’t want to crack any plastic parts.
The Moment of Truth: Testing Your Lamp
Now, plug your lamp back into the wall outlet. Turn on the switch. Did it light up? Congratulations! You’ve successfully replaced your lamp socket. If it didn’t turn on, don’t panic. Double-check that the plug is firmly in the outlet. Then, unplug the lamp again and carefully re-examine your wiring connections. Ensure the wires are securely attached to the correct terminals and that no stray strands are touching each other or the lamp’s metal parts. Sometimes, the new bulb might be the issue, so try a different bulb to be sure.
Troubleshooting Common Issues
Even with careful work, sometimes things don’t go perfectly the first time. Here are a few common hiccups and how to fix them.
Lamp Still Won’t Turn On
This often points to a wiring issue. Unplug the lamp. Carefully re-check the photo you took. Make sure the hot and neutral wires are on the correct terminals. Ensure the terminal screws are tight. If your lamp has a pull chain switch, check that the chain is properly connected internally, though this is less common with simple socket replacements.
Flickering Light or Intermittent Power
This usually means a loose wire connection. Unplug the lamp and re-tighten the screws on the new socket. Ensure the wire insulation isn’t pinched between parts where it shouldn’t be.
Socket Feels Loose
Tighten the retaining ring or threaded cap that holds the socket in place. If the lamp’s internal pipe is loose, you might need to tighten that as well, sometimes with pliers.
You’ve done it! You’ve successfully tackled a common household repair. Giving your lamp a new socket not only saves money but also helps reduce waste. It’s a rewarding fix that you can be proud of.
Conclusion
You’ve successfully navigated the process of replacing your lamp socket! Remember, safety is always the top priority. By following these steps, you’ve not only saved your lamp but also gained a practical DIY skill. You’ve learned how to identify the right parts, safely disconnect power, swap out the old socket, and wire it correctly. It’s a rewarding fix that brings functional art back into your home. Don’t hesitate to tackle other simple home repairs – you’ve proven you can do it!
Frequently Asked Questions
Can I replace a lamp socket if I have a pull chain switch?
Yes, you can. Many replacement sockets come with or can accommodate a pull chain mechanism. You’ll need to ensure the new socket is designed for a pull chain and carefully transfer the wires from the old mechanism to the new one, following the same wiring principles outlined previously.
What if my lamp has a different type of socket connection, like a clip-on?
If your old socket uses a different connection method, such as a clip-on style or a hardwired connection, you’ll need to find a replacement that matches. For clip-on sockets, ensure the new one has the same mounting mechanism. For hardwired lamps, always consult an electrician if you’re unsure about disconnecting and reconnecting permanent wiring.
My new lamp socket seems smaller than the old one. Will it still work?
Sometimes, newer sockets are designed more compactly. As long as the new socket physically fits into the lamp’s housing and its electrical connection type (screw terminals) matches the wires from your lamp cord, it should function correctly. Ensure it’s securely fastened to prevent it from becoming loose.
How do I know if the wires are “hot” and “neutral” if they don’t have a stripe?
If the wires are identical, you can often tell by the insulation texture. One wire typically has ridges or a ribbed texture, which is the neutral wire. The other wire usually has smooth insulation and is the hot wire. It’s always best to take a clear photo before disconnecting and double-check your socket’s markings for reference.
Is it safe to use an old lamp cord if the socket is replaced?
Generally, if the lamp cord is in good condition – no frays, cracks, or damage to the insulation – it’s usually safe to reuse. However, if the cord shows any signs of wear or damage, it’s highly recommended to replace the entire cord set for safety. A damaged cord can be a fire hazard.

![10 Best Cordless Nail Lamp [2026]](https://bestdesklamp.com/wp-content/uploads/2026/09/10-best-cordless-nail-lamp-2026-featured-768x432.jpg)