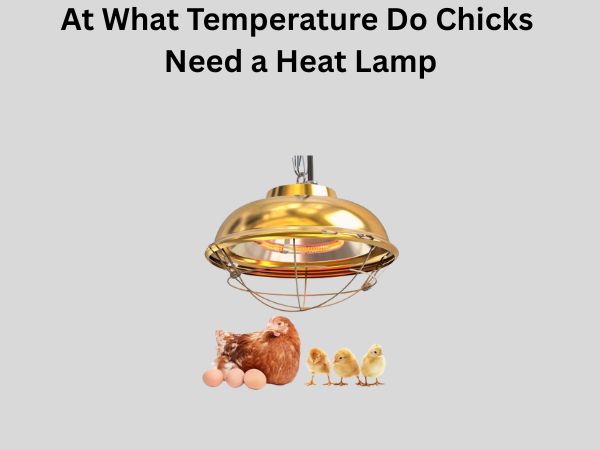
At What Temperature Do Chicks Need a Heat Lamp? A Complete Guide for New Poultry Farmers
If you’re raising baby chicks for the first time, you’ve probably found yourself staring at a heat lamp wondering if you’ve got the temperature just right. It’s one of those questions that sounds simple on the surface, but the answer is actually more nuanced than you might expect. Getting the temperature wrong can mean the difference between healthy, thriving chicks and a flock that struggles from day one.
Let me be honest with you—I’ve seen new chicken keepers make temperature mistakes, and it’s usually because they didn’t have clear guidance. That’s exactly why I’m writing this article. We’re going to walk through everything you need to know about heat lamps for chicks, from the moment they arrive at your door until they’re ready to move outside.
Understanding Why Chicks Need Heat Lamps in the First Place
Here’s the thing about baby chicks: they’re basically tiny, fluffy balls that have just left their mother’s side. In nature, a hen would keep her chicks warm under her wings and body heat. Since we’re raising them without a broody hen, we need to replicate that warmth artificially using a heat lamp.
Think of a heat lamp as a substitute mother. It provides the warmth that chicks can’t generate on their own during their first weeks of life. Without adequate heat, chicks will huddle together desperately, stress out, and become vulnerable to disease. Some might not survive at all.
The warmth from a heat lamp isn’t just about comfort—it’s essential for proper digestion, growth, and development. Young chicks require consistent temperatures to function properly, and when they get too cold, their metabolism slows down dangerously.
The Ideal Temperature Range for Baby Chicks
Starting Temperature: Your First Week
When your chicks first arrive, they need to be warm. Really warm. I’m talking about around 95 degrees Fahrenheit at the level where the chicks are actually sitting. This is the critical starting temperature, and it’s non-negotiable if you want your chicks to thrive.
The first week is essentially an adjustment period. Your chicks have just experienced the stress of shipping or travel, and they need a warm, safe environment to recover. At 95 degrees, they’ll be able to digest their food properly, develop normally, and start building their strength.
You might notice something interesting during this first week: your chicks will be fairly spread out in your brooder. They won’t be huddled in a tight ball, and they won’t be panting from heat stress. That’s exactly what you want to see. It means the temperature is spot-on.
Week Two: The First Temperature Reduction
As your chicks grow—and they grow remarkably fast—their ability to regulate their own body temperature improves. By the time they hit their second week of life, you can start backing off the heat slightly. Reduce the temperature to about 90 degrees Fahrenheit.
This reduction might seem small, but it’s significant to growing chicks. You’re essentially teaching them to handle slightly cooler conditions while still providing plenty of warmth for proper development. Continue watching their behavior to confirm they’re comfortable.
Week Three Through Six: Gradual Reduction
Here’s where patience becomes your best friend. Each week going forward, reduce the temperature by about 5 degrees. So you’re looking at roughly:
- Week three: 85 degrees
- Week four: 80 degrees
- Week five: 75 degrees
- Week six: Around 70 degrees or less
By week six, many chicks are developing enough feathers and strength that they may not need supplemental heat at all, depending on your climate and brooder setup. However, if your brooder is in a cold environment, you might need to maintain some warmth a bit longer.
Reading Your Chicks: The Behavior Method
What Do Comfortable Chicks Look Like?
Here’s a secret that no thermometer can tell you: your chicks will show you when the temperature is right. You just have to know what to look for. Comfortable chicks display a specific set of behaviors that are unmistakable once you recognize them.
Happy, warm chicks will be actively moving around your brooder, eating, drinking, and playing. They’ll be curious and engaged with their environment. You might see them pecking at bedding, exploring toys, and generally acting like normal chicks do. Their activity level is a green light that everything’s working well.
Signs Your Chicks Are Too Cold
Cold chicks are miserable chicks, and they’ll let you know about it. When the temperature drops too low, you’ll see them huddling together in a tight clump, usually directly under or very close to the heat lamp. They might be peeping constantly and seem stressed. Some might even pile on top of each other desperately.
Beyond the behavioral signs, you might notice that cold chicks eat less and grow more slowly. In severe cases, they can develop digestive problems or become sick more easily. This is why getting the temperature right from the beginning is so important—it prevents a cascade of problems down the line.
Signs Your Chicks Are Too Hot
Interestingly, overheated chicks show the opposite behavior. They’ll huddle as far away from the heat lamp as possible, usually in the corners of your brooder. You might see them panting with their beaks open, wings spread away from their bodies, and they’ll seem lethargic and less interested in food and water.
Overheating is actually dangerous, though it’s less common than underheating because most people err on the side of caution. Chicks that are too hot experience stress, reduced growth rates, and increased disease susceptibility. Long-term exposure to excessive heat can cause serious problems, so it’s worth getting right.
Using a Thermometer: Your Temperature Confirmation Tool
Where to Place Your Thermometer
While reading your chicks’ behavior is incredibly valuable, having an actual thermometer is your safety net. The key is placing it correctly. Your thermometer should be positioned at the height where the chicks actually rest—not at the edge of the brooder or high up in the air. This is typically 2 to 3 inches above the floor of your brooder.
Place it in the warmest spot of your brooder, which is usually directly under or very close to the heat lamp. Take readings several times throughout the day because temperatures can fluctuate. Early morning readings and evening readings can differ, so you want to capture that variation.
Types of Thermometers That Work Best
You have several options for monitoring temperature. A simple analog thermometer is affordable and reliable. Digital thermometers with probes work wonderfully too, and some people prefer the ease of reading a digital display. There are even wireless thermometers that let you monitor temperature from your phone, which is pretty convenient if you have a larger operation.
Whatever type you choose, make sure it’s accurate. A thermometer that’s off by even a few degrees can lead to problems. If you’re unsure about your thermometer’s accuracy, you can sometimes verify it by comparing it to another one or taking it to a farm supply store where they might have calibration equipment.
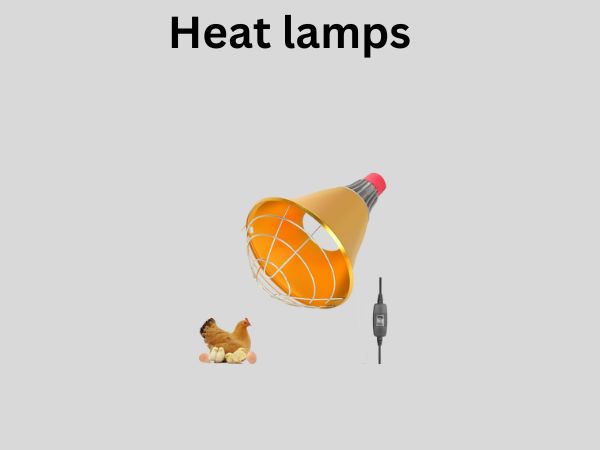
Heat Lamp Setup: Getting the Right Equipment
Choosing the Right Heat Lamp Wattage
Not all heat lamps are created equal. They come in different wattages, typically ranging from 125 watts to 250 watts. The wattage you need depends on several factors: how many chicks you have, how large your brooder is, and what kind of insulation you’re using.
For a small brooder with 10 to 15 chicks, a 125-watt lamp is usually sufficient. For larger brooder setups with 25 or more chicks, you might need 250 watts. The important thing is that you can adjust the temperature by raising or lowering the lamp rather than relying on different wattages.
Lamp Placement and Height Adjustment
This is where the magic happens. By moving your heat lamp up or down, you can make fine adjustments to the temperature without having to replace the bulb constantly. A lamp positioned 12 inches above the brooder floor will create more heat than one positioned 18 inches above.
I recommend starting with your lamp about 12 inches above where your chicks will rest and then making adjustments based on the thermometer readings and your chicks’ behavior. You might move it up or down several times as you dial in the perfect temperature for that particular day.
Environmental Factors That Affect Heat Lamp Effectiveness
Brooder Location and Insulation
Where you place your brooder makes a huge difference in how much heat you need. A brooder in a warm room or a well-insulated space will maintain temperature more easily than one in an uninsulated garage or outdoor shed. If your brooder is in a cold location, you might need to compensate with a higher heat lamp setting or additional insulation.
Consider using reflective materials around your brooder to help contain the heat. Some people wrap their brooders partially with cardboard or use brooder skirts to keep warm air from escaping. This is especially helpful if you’re raising chicks during cold months.
Season and Weather Conditions
Raising chicks in winter is entirely different from raising them in summer. Winter chicks need more consistent, higher heat because the ambient temperature outside your brooder is colder. Summer chicks might overheat if you’re not careful with your heat lamp placement.
Pay attention to overnight temperatures. If you’re raising chicks in a location where nighttime temperatures drop significantly, you’ll need to maintain heat throughout the night. Some people reduce heat slightly at night once chicks are older, but this depends on your specific situation.
Common Heat Lamp Mistakes to Avoid
Using a Regular Light Bulb Instead of a Heat Lamp
This is a surprisingly common mistake, and it usually doesn’t end well. Regular incandescent light bulbs produce some heat, but not nearly enough to maintain the temperatures chicks require. They also use a lot of electricity for minimal heat output, making them inefficient.
Always use actual heat lamp bulbs designed for brooding. They’re specially manufactured to produce significant infrared heat and maintain consistent temperatures. They’re not expensive, and they’re worth every penny for the peace of mind they provide.
Not Checking Temperature Regularly Enough
I’ve seen people set up a heat lamp and then assume everything’s fine until they notice a problem with their chicks. Temperature can fluctuate throughout the day based on ambient conditions, and it’s your job to catch those changes. Check your thermometer at least once or twice daily, more if you’re starting out.
Ignoring Your Chicks’ Behavior
Some people get so focused on the thermometer that they forget to watch their chicks. While the thermometer is helpful, the chicks themselves are your most reliable indicator. If they’re huddled under the lamp looking miserable despite what your thermometer says, something’s wrong. Trust what you’re seeing and adjust accordingly.
When to Stop Using a Heat Lamp
Age Considerations
Most chicks can completely transition away from supplemental heat by 6 to 8 weeks of age, assuming they’re in a reasonable temperature environment. By this time, their feathers have come in substantially, and they’re large enough to regulate their own body temperature effectively.
However, if you’re raising chicks in an extremely cold climate, you might need to provide some heat longer. Use the same visual cues you’ve been using all along: watch your chicks’ behavior. If they seem comfortable without the lamp, they don’t need it anymore.
Transitioning to the Outdoors
The move from your indoor brooder to a coop or outdoor enclosure is a big transition. If you’re moving chicks outside when they’re still relatively young—say, 4 to 5 weeks old—they might still benefit from some heat, especially at night. A heat lamp in a secure outdoor coop can make this transition smoother.
Older chicks that are fully feathered can handle outdoor temperatures without supplemental heat, assuming it’s not brutally cold. Just make sure your coop is well-ventilated and free from drafts, and that your chicks have plenty of space to move around.
Troubleshooting Common Heat Lamp Problems
Heat Lamp Keeps Going Out or Burning Out
Heat lamp bulbs can sometimes fail, especially if they’re cheap quality. Invest in good quality bulbs from reputable suppliers. If your bulbs keep burning out prematurely, you might have a voltage issue or you might be using the wrong type of socket. Check that everything is compatible and properly connected.
Temperature Won’t Stay Consistent
If your temperature keeps fluctuating wildly, you might have a thermostat issue or your lamp might be too powerful for your brooder size. You can help stabilize temperature by improving insulation, using a dimmer switch to regulate the lamp, or repositioning the lamp more carefully.
Special Situations: Brooding Without Electricity
What if you don’t have reliable electricity for a heat lamp? Some people use alternatives like heated pads designed for animals or even hot water bottles, though these require much more hands-on attention. You’d need to change water bottles regularly and monitor temperature constantly, which is honestly more work than just using a heat lamp.
If you must go without electricity, start with heat lamps and transition to alternative methods only after your chicks are older and more resilient. The few weeks when chicks need consistent heat are critical for their survival and development.
Conclusion
So, at what temperature do chicks need a heat lamp? The answer starts at 95 degrees for your first week and gradually decreases by about 5 degrees each week until your chicks are around 6 to 8 weeks old. But honestly, the real answer is more nuanced than just numbers on a thermometer.
The best approach combines thermometer readings with careful observation of your chicks’ behavior. Watch how they move, eat, and rest. Listen to their peeping. Get to know what comfort looks like. When you combine this observation with regular thermometer checks and proper equipment setup, you’ll create an ideal environment where your chicks can thrive.
Remember that every chick, every brooder, and every situation is slightly different. What works perfectly for one person might need adjustment for another. Don’t be afraid to tweak your setup, make small changes, and adapt as you learn what your particular chicks need.
Raising chicks is rewarding, and getting the heat lamp temperature right from the beginning sets the stage for healthy, productive birds. You’ve got this, and your future flock will thank you for the care and attention you’re putting in right now.
Frequently Asked Questions
What happens if chicks get too cold overnight?
Chicks that experience prolonged cold exposure can develop serious problems. They might become lethargic, stop eating, develop digestive issues, or become susceptible to illness. In severe cases, excessive cold can be fatal, especially for very young chicks. This is why maintaining consistent heat 24 hours a day is so important, particularly during the first few weeks. Never leave your heat lamp off at night unless your chicks are older and the ambient temperature is reasonably warm.
Can I use a heat plate instead of a heat lamp for my chicks?
Yes, heat plates designed for brooding are becoming increasingly popular and are an excellent alternative to traditional heat lamps. They’re energy efficient, produce less overall heat in the brooder, and many people feel they more closely mi