How Long Should the Wick Be on an Oil Lamp? A Simple Guide
The ideal wick length for an oil lamp is about 1/8 to 1/4 inch above the burner collar. That’s it. Anything taller tends to smoke, flicker, and burn through fuel way faster than it should.
Why does this tiny detail matter so much? Because the wick height controls the flame. Too tall and you get soot and a wobbly flame. Too short and your lamp burns dim or keeps going out on you. We researched this topic and found that most lamp makers and collectors agree the 1/8 to 1/4 inch range gives you the cleanest, steadiest light.
Here’s the quick version before we get into the details:
- Keep the wick 1/8 to 1/4 inch above the burner for best results.
- Trim the wick evenly and straight across to avoid an uneven flame.
- A smoky or flickering flame usually means the wick is too high.
- A dim or dying flame often means the wick is too low or needs trimming.
- Check and adjust the wick each time you light the lamp for a clean burn.
Below, we break down everything you need to know about oil lamp wick length, from trimming tips to troubleshooting a stubborn flame. Let’s get your lamp burning bright and clean.
Getting Your Oil Lamp Wick Height Just Right
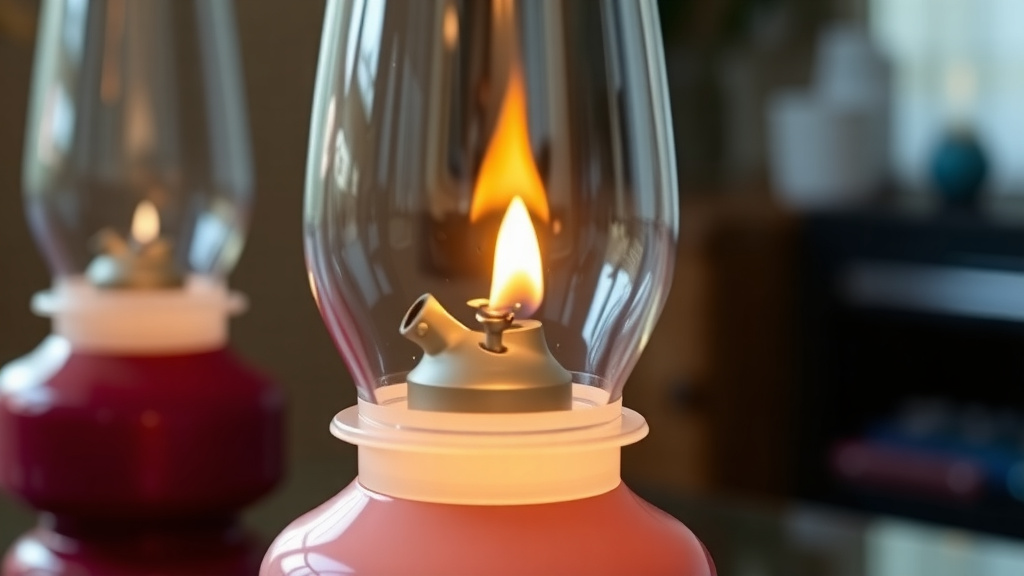
Aim for 1/8 to 1/4 inch of wick showing above the burner collar. That small strip of fabric is all your flame needs. When we researched how lamp manufacturers set their burners, we found they design the wick mechanism around exactly this range.
Think of it like a gas stove. You wouldn’t crank every burner to full blast just to boil water. Your lamp works the same way. A modest flame burns cleaner, longer, and cheaper.
Why Wick Height Changes Everything
The wick pulls fuel upward, and the flame burns at the tip. Raise the wick too far and the flame can’t get enough oxygen. That’s when you see smoke, soot, and flickering. Lower it too far and the flame struggles to stay fed.
So the sweet spot isn’t random. It’s the height where fuel flow and air flow balance out. Get it right, and your lamp hums along like a happy campfire.
Signs Your Wick Is Set Wrong
Your lamp will tell you pretty quickly when something’s off. Watch for these clues:
- Black soot on the chimney or glass means the wick is too high.
- A jumping, dancing flame points to excess wick or a draft.
- An odor like burning fabric suggests the wick is scorched or uneven.
- A flame that shrinks and dies means the wick sits too low.
- Yellow tips with heavy smoke often mean it’s time to trim.
How to Trim an Oil Lamp Wick the Right Way
Trimming sounds scary the first time, but it’s honestly simple. Straight and even are the two words to remember. A crooked wick gives you a lopsided flame that soots on one side.
Before you trim, make sure the lamp is completely cool and the fuel is capped or removed. Safety first. Kerosene and open flames don’t mix with rushing.
Trimming Steps for a Clean Burn
Here’s the routine we found works best for beginners:
- Turn the wick up fully so you can see the burned edge.
- Cut straight across with sharp scissors, removing only the charred part.
- Check that the corners match the middle. Round corners burn unevenly.
- Lower the wick back to the 1/8 to 1/4 inch range before lighting.
- Wipe away loose fibers so they don’t fall into the fuel.
How Often Should You Trim?
Most lamp users trim after every few burns, or whenever they see a charred, crusty edge. If you burn your lamp daily, a quick check each week keeps things tidy. It takes thirty seconds. Your lungs and your lamp glass will thank you.
On that note, ventilation matters too. Health agencies like the CDC warn that burning kerosene indoors without airflow can affect air quality. Crack a window or run your lamp near good ventilation.
Wick Length vs. Flame Quality: A Quick Comparison
Not sure what your flame is telling you? This table breaks it down fast:
| Wick Height | Flame Look | What It Means |
|---|---|---|
| Under 1/8 inch | Dim, blue, sputtery | Too low; raise the wick |
| 1/8 to 1/4 inch | Steady, bright, no smoke | Perfect; leave it alone |
| Over 1/4 inch | Tall, smoky, flickering | Too high; lower it |
| Uneven or charred | Lopsided, sooty on one side | Trim straight and even |
Different Lamp Types, Slightly Different Rules
Not all lamps read from the same playbook. Flat wicks and round wicks behave a bit differently, so a few tweaks help.
Flat Wicks in Classic Hurricane Lamps
Classic hurricane and chamber lamps use flat wicks, usually 1/2 to 3/4 inch wide. Keep them in the standard 1/8 to 1/4 inch range. Many experts say these lamps perform best when the flame sits just at the top of the chimney’s air draft.
Round Wicks in Center-Draft Lamps
Round wicks feed fuel from the center and burn hotter. They still like a low profile, but check your lamp’s manual if you have one. Antique center-draft burners can be picky.
Aladdin-Style Mantle Lamps
Mantle lamps are a different animal. The mantle glows rather than the flame itself, so the wick often sits a touch higher. When we researched mantle lamp guidance, we found most makers suggest starting low and turning up slowly until the mantle glows bright white. Never crank it into the smoky zone.
Fuel and Wick Care Tips That Extend Burn Time
Your wick is only half the equation. Clean fuel and a healthy wick work together. If you’re curious what happens between the fuel and the flame, our guide to how kerosene lamps work walks through the whole process.
- Use fresh, clean kerosene or lamp oil. Old fuel gums up the wick.
- Never let the fount run dry while the wick is lit.
- Store lamps with the burner snug so dust stays out.
- Replace a wick that’s stiff, stained, or over a year old.
- Keep spare wicks on hand. They’re cheap, and they’re your lamp’s lifeline.
Quick Wick Checklist Before Every Light
Here’s your 60-second pre-light routine. Run through it and your lamp will behave every time:
- Check the height: Is 1/8 to 1/4 inch of wick showing?
- Look at the edge: Is it straight, even, and free of char?
- Confirm fuel level: Is the fount at least half full?
- Inspect the chimney: Is the glass clean and seated properly?
- Scan your space: Is the lamp on a stable surface away from curtains?
- Light low, then adjust: Start low and raise slowly to a steady flame.
That last point is the one most people skip. Lighting low and raising the wick gradually prevents that puff of soot that dirties your chimney before the evening even starts. Small habit, big difference.
Troubleshooting Stubborn Flames
Sometimes you do everything right and the flame still misbehaves. Don’t toss the lamp out the window just yet.
The Flame Won’t Stay Lit
A flame that keeps dying usually means the wick is saturated poorly or sitting too low. Raise it slightly. If that fails, the wick may be old and waxy. A fresh wick often solves it in minutes.
The Flame Smokes Even at the Right Height
If the height is correct but smoke persists, look at the fuel and the chimney. Dirty fuel burns dirty. And a chimney that’s not seated right disrupts the air draft the flame depends on. Fix those two, and most stubborn smoke disappears.
Conclusion
Getting your oil lamp wick right comes down to one simple habit: keeping it at 1/8 to 1/4 inch above the burner collar. Trim it straight and even, watch what your flame tells you, and adjust in small steps. Pair that with fresh fuel and a clean chimney, and your lamp will burn bright with little fuss. When we researched common lamp problems, nearly all of them traced back to wick height or wick condition. So before your next lighting session, grab a pair of sharp scissors, give that charred edge a clean trim, and run through the quick pre-light checklist. Thirty seconds of prep buys you hours of steady, soot-free glow.
Frequently Asked Questions
Can I make my oil lamp burn brighter without raising the wick?
Yes. Often a fresh wick, clean fuel, or a properly seated chimney does more than extra height. A clean wick draws fuel better, which feeds a stronger flame naturally. Try trimming and refueling before you touch the wick knob.
Why does my oil lamp flame flicker even with the wick set correctly?
Flickering usually comes from a draft, not the wick. Windows, fans, and doorways can all disturb the flame. Move the lamp to a calmer spot or close the nearby window and see if it steadies.
Should I trim a brand new oil lamp wick before first use?
Not necessarily. New wicks usually come pre-cut, so just check that the edge is straight and even. If it looks crooked or frayed, a quick trim before the first burn helps you start clean.
Can I use scissors to trim my oil lamp wick, or do I need a special tool?
Sharp household scissors work fine for flat wicks. Just make sure the lamp is cool and cut straight across. Some lamp owners like a wick trimmer or roller tool for round wicks, but it’s not required.
How long does an oil lamp wick last before it needs replacing?
With regular trimming and clean fuel, most wicks last months of occasional use. Replace it when the fabric gets stiff, stained, or refuses to draw fuel evenly. Keeping a spare on hand costs just a few dollars and saves your evening.